
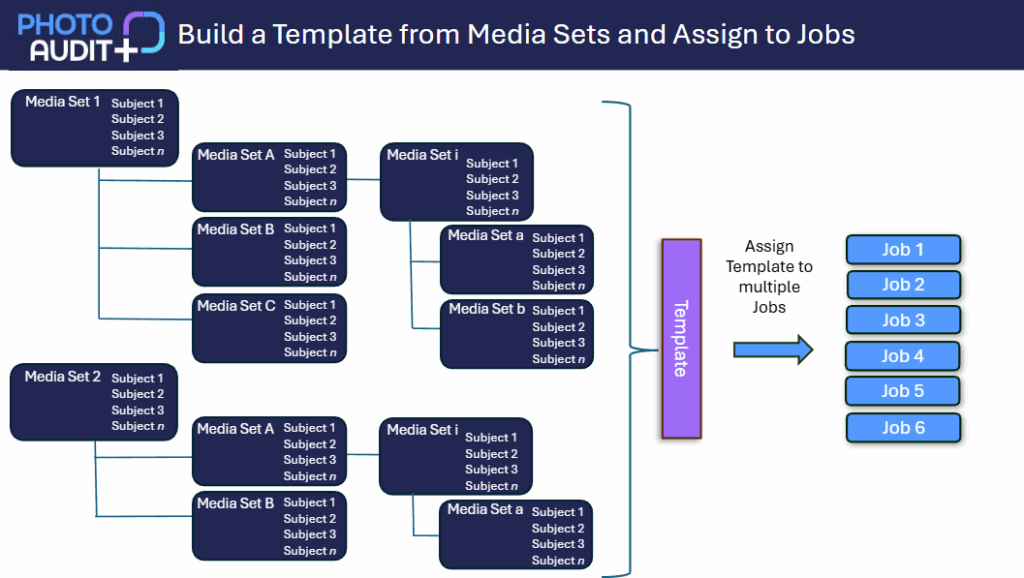
A Media Set is a pre-defined group of photos that can be used and reused in different Job Templates. It acts as a building block to be used and reused, once it has been created. A Job Template can be made up of one or more Media Sets. It is best to create Media Sets first, then put them together into a Template.
What can I see in the Media Set grid?
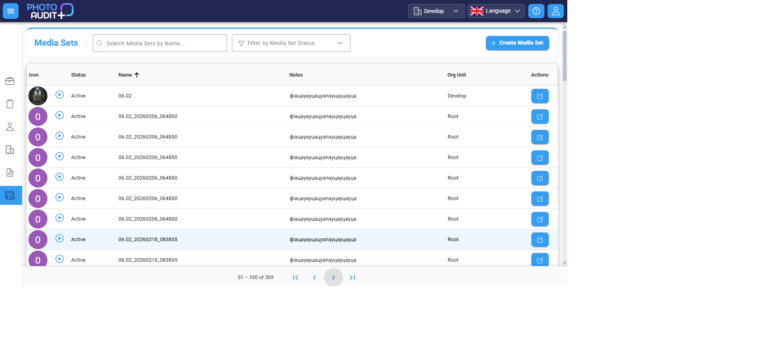
- Admins and Template Managers can view and edit all Media Sets from the Media Set grid.
The columns of the grid show:
- An icon or 2 initials, to help quickly identify a Media Set.
- The Status of a Media Set; this can be Active, Inactive or Archived
- The name of the Media Set – unique in its Org Unit.
- Optional Notes, which provide extra information.
- Org Unit – the home Org Unit of that Media Set.
How to create, view and edit a Media Set
- Only Admins and Template Managers can create or edit the Media Set.
- Click the name of a Media Set from the grid to open the Details window – the name of the Media Set is shown with its Home Org Unit and Status below.
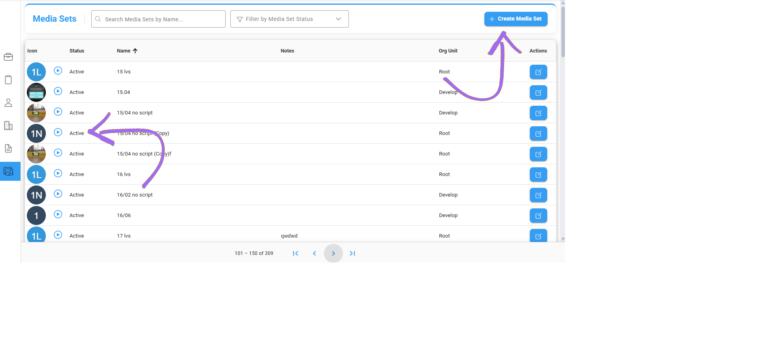
- Click the +Create Media Set button to create a new Media Set.
Details tab:
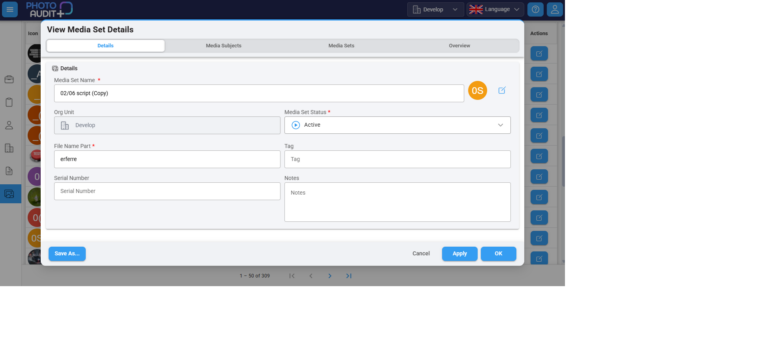
- Name: Unique in the Org Unit. This is the name of the ‘building block’ of photos, which can be used and reused, using a different name each time, if required.
- Org Unit: home OU of the Media Set. The Media Set can be used in Templates on this OU or child OUs.
- File name part: letters or numbers to form part of the file name of any photos taken for this Media Set
- Tag and Serial Number: optional data relating to external workflows.
- Notes: optional additional information
Media Set Status:
- When drafting a Media Set, the default status is Inactive – it appears in the Media Set grid (so it can be completed and activated in due course) but does not appear on the Media Sets available to add to a Job Template.
- When the Media Set is complete and you are ready to make it available to use, you can change the status to Active.
- When you no longer need to see the Media Set in the grid, you can change the Status to Archived.
Media Subjects tab: These are individual photos that need to be taken.
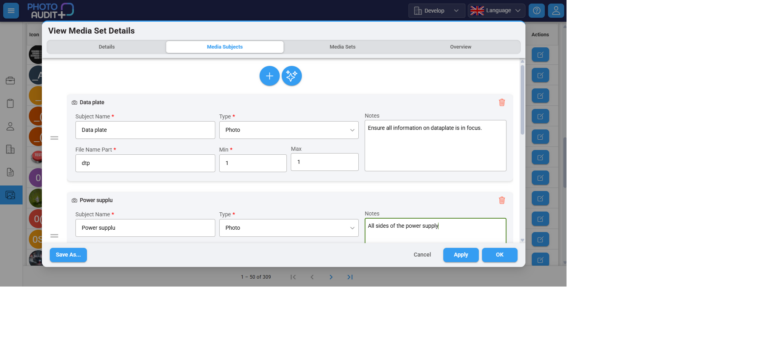
For each Subject, you can explain what you need to see via:
- Name of Subject – what you need a photo of.
- Type – currently, only photos can be added to PhotoAudit+, but in future other kinds of media can be used.
- File name part: letters and numbers that will form part of the file name when a photo is downloaded from PhotoAudit+.
- Min/max: number of photos required for this Subject. A min of 0 means a Subject is optional, or not required eg photos of damage. If there is no maximum, this can be left blank.
- Notes: optional extra information on what must be shown in the photo.
- The order of the Media Subjects can be adjusted using the = sign to drag and drop.
Media Sets tab: these are smaller Media Sets that form part of this larger, parent, Media Set.
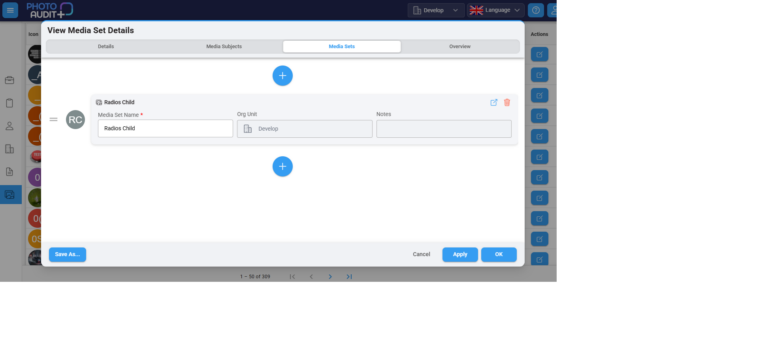
- The tab shows the Media Sets that have been included within the larger Media Set.
- The order of the Media Sets can be adjusted using the = sign to drag and drop.
- Click + to add a Child Media Set.
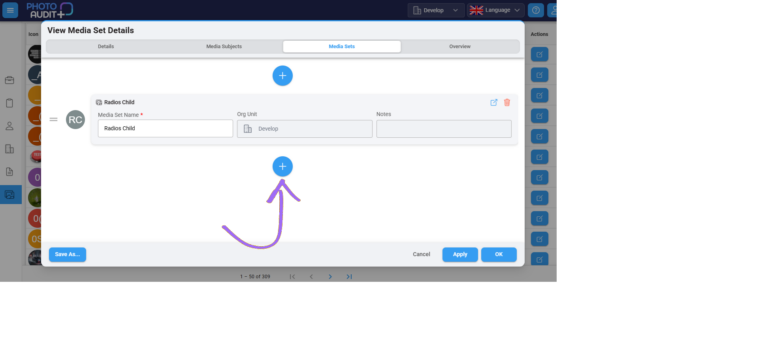
- You will see the Media Set library. It shows all those available to you. You can use the Filters to help find an existing Media Set.
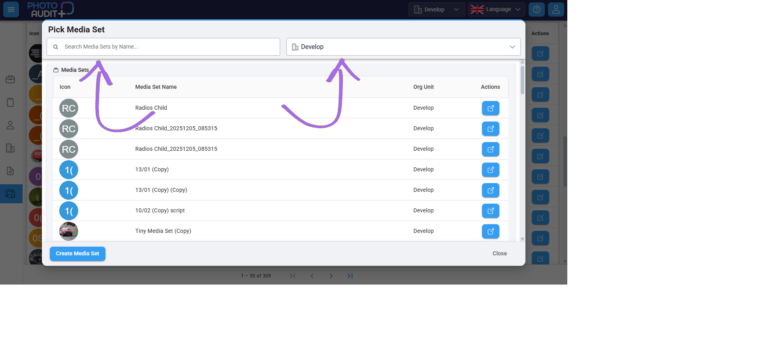
Select a Media Set and it will appear as a Child Media Set.
- You can then change the name if required.
- You can add multiple copies of the same Child Media Set and give each a unique name eg the same ‘charging bay’ Media Set can be used multiple times and named ‘Charging Bay 1’, ‘Charging Bay 2’ etc.
- If your Child Media Set does not yet exist in the Media Set grid, click Create New Media Set (using the instructions above).
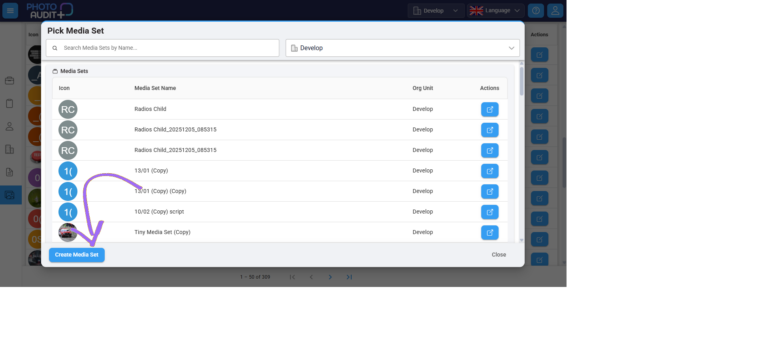
What if I want a slightly different Media Set?
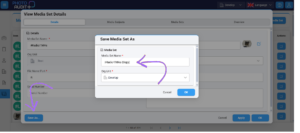
- Open a Media Set from the Media Set Grid, make a change and Save As ‘new version’.
- You can click the Save As button and a new copy of the Media Set will be created. This can be renamed, and then edited to suit.
What happens if I edit a Media Set?
- When you add/remove or edit the contents of a Media Set eg remove a Subject, click OK and the earlier version is no longer saved.
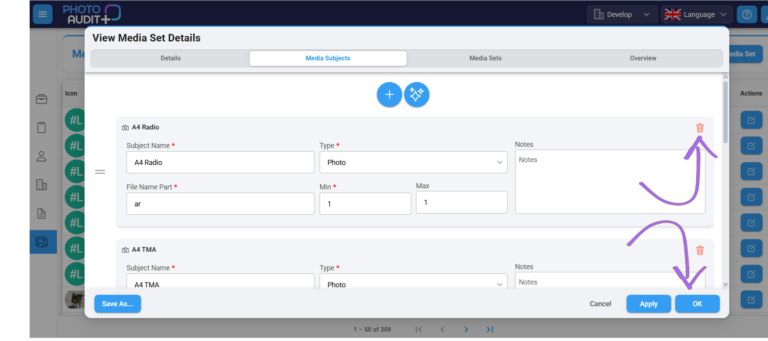
- When you add/remove or edit the contents of a Media Set, all the Job Templates or Parent Media Sets that contain that Media Set will contain the new version, so there is no need to make the same change in each Template.
- If a Job Template has already been assigned to a Job, then this has become the Checklist for the Job and will not be affected by changes to the Media Set in the Media Set Grid.
AI Media Sets
- Let AI create a draftMedia Set to meet your needs – then edit to refine.
- Once you have completed the Details tab of your new Media Set, go to the Media Subjects tab and click the stars button. PhotoAudit+ will use AI to create a proposed list of Subjects, each with a name.
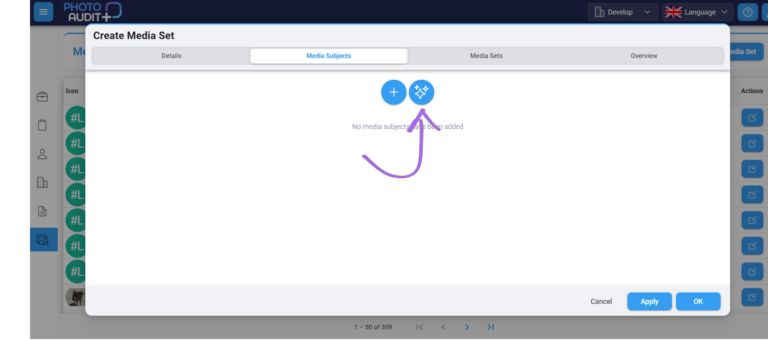
Complete your AI prompt:
- Industry Sector – be specific for improved relevance.
- Job Name – broadly, what is the work that requires photo evidence?
- Task – specifically, what the on-site worker is doing in this part of the work.
- Subject Count – how many photos you require for this task.
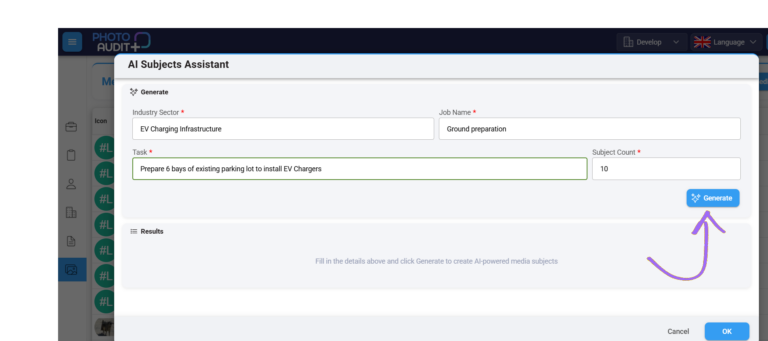
- Click Generate and review the proposed list of Subjects. If they are not appropriate, adjust the prompt and click Generate again. When you’re happy with this draft list, click OK.
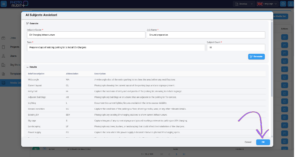
- You can adjust this list of Subjects later
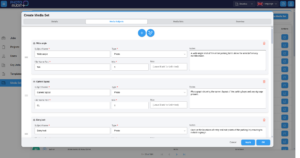
A proposed Media Set is shown for review or edit. You can:
- Edit the Subject name, file name part or Notes.
- Make a Subject optional, by changing the Min number of photos to zero or add a Max number of photos.
- Change the order of Subjects by dragging the = symbol up or down.
- Remove unwanted Subjects.